In the Azure Web Apps article, I created a web application and selected Azure AD authorization directly from VS during project creation. Behind the scenes, this registred the application in Azure AD and created the plumbing required to delegate authentication to Azure AD.
Now let’s examine a walkthrough to manually configure a web application to delegate authentication to Azure AD, using our knowledge of OpenID Connect.
First thing to do is to register our application in Azure AD and get our hands on the client id assigned to this application. As you know, in OAuth the client id is required during the protocol dance.
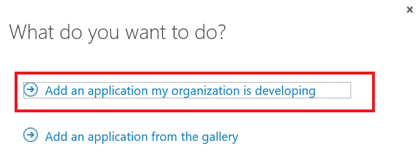
So from Azure old portal, register a new application (till the time I wrote this post, still Azure AD was only accessible from the old portal “manage.windowsazure.com”):
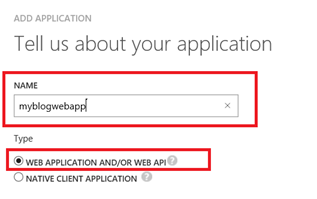
Supply the application configuration – I will call my application “myblogwebapp”:
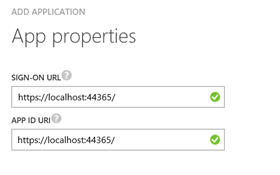
Then supply the sign-on URL which is the real URL of the application – as you can see in this case I supply localhost and the port on my machine (this will be the SSL URL of my application which I will create in a moment). The APP ID on the other hand is a URI to uniquely identify the application; it doesn’t have to be the real URL, but in this case it is.
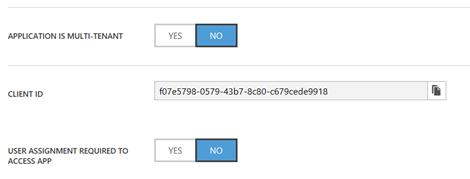
After creation, now we can get the generated client id from application configuration:
Ok, now to VS and create a new MVC application – as I did in Azure I called it “myblogwebapp”:
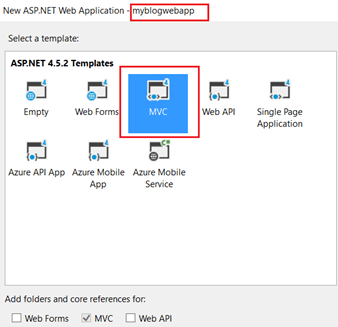
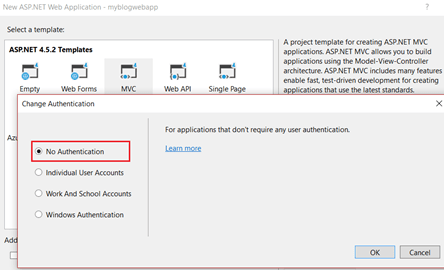
This time around, unlike what we did in the Azure Web App sample, select Change Authentication à No Authentication as we will write the authentication logic by hand:
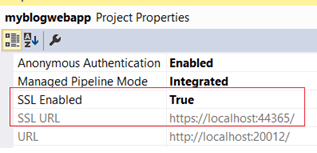
Enable SSL, and note the SSL URL. This is the URL we supplied in Azure AD when we registered the application:
Now we need a set of Nuget packages to pull of the authentication mechanism:
- IdentityModel.Protocol.Extensions: contains the basic functionality to support OpenID Connect and WS-Federation
- IdentityModel.Tokens.Jwt: contains the types required to create, serialize, and validate JWT tokens. JWT (JSON Web Token) is the most commonly used format in OAuth, and it’s the one you will see later.
- Owin.Security.OpenIdConnect: remember our discussion around OWIN and Katana middlewares? Well this contains the out of the box OpenID Connect middleware
- Owin.Security.Cookies: yet another Katana middleware, this time to support cookie based authentication. Remember, we’re using OpenID Connect for authentication, so cookies (i.e. session management) is required
- Owin.Host.SystemWeb: this is the server required to allow OWIN-based applications to run using the ASP.NET request pipeline on IIS
Now recall that one of the things that Katana gives is a framework to initialize the OWIN pipeline. There are multiple ways to initialize this framework, the most common is supplying a class called “Startup” with required configuration:
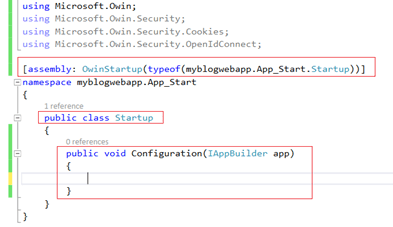
The OwinStartup attribute marks this class for automatic startup. Any middlewares registered in this class then form the OWIN Http pipeline. The Configuration method receives an IAppBuilder which supports the initialization of the application. Remember the IDictionary<string, object> I talked about? Well this is a member of the IAppBuilder interface.
Now all what is required is to supply the basic plumbing required for the application to delegate authentication to Azure AD – keeping in mind that what you see here is the minimum and most basic configuration required. You can explicitly control multiple aspects of the protocol, but for now let’s go with the basic stuff:
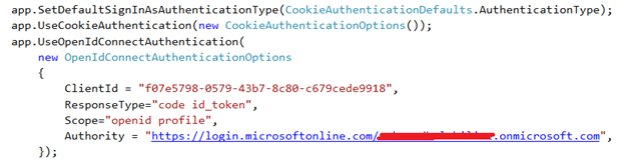
The “UseCookieAuthentication” method registers the cookie middleware, while the “UseOpenIdConnectAuthentication” registers the protocol middleware. As you can see we supply the minimum configuration required:
- ClientId: this is the one we got from Azure AD upon application registration
- ResponseType: this will be the response_type request parameter; in this case we want back a “code” since this is an Authorization Code Flow, and of course an “id_token” since we’re using OpenID Connect for authentication
- Scope: as I explained, all OpenID Connect requests must include the openid scope, and in this case we want to access the profile of the logged in user
- Authority: this a combincaiton of the Azure AD instance (which is login.microsoftonline.com) and the Tenant which is ([myaccount].onmicrosoft.com)
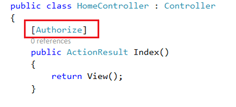
Final step is add a protected resource in our application where authentication will be required. Here I will simply add the MVC [Authorize] attribute on the Index ActionResult in my HomeController; if you’re not familiar with it, this is basically saying “access to this resource is only allowed to authorized users”. Therefore, when I request this resource – which in this case is simply by browsing to the homepage of my application – this will kick in the authentication challenge and we will be redirected to Azure AD (where of course the OWIN OpenID Connect middleware which we wired in the Startup class takes control):
Finally, start the application. The Index will be invoked, it will see that the user is not authenticated, and will redirect to Azure AD UI for the user to supply the credentials:

After supplying credentials, and redirected back to the application, we can check that everything went as expected, be examining the following:
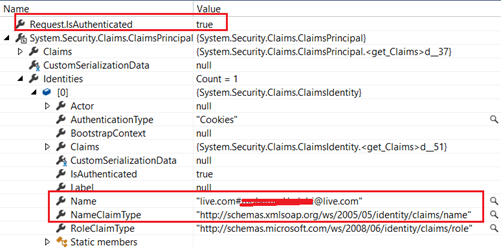
Notice that “Request.IsAuthenticated” returns true, and we have a name claim, and the user is my Azure AD user (remember I used my default Azure account and did not create new users).
Now let’s have a peek about what happened behind the scenes using Fiddler. Here we see the request to Azure AD after we’ve been redirected by the application:
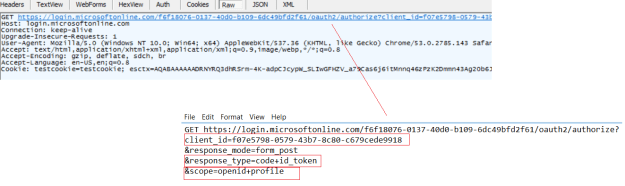
As you can see, we pass in the client_id which recall was assigned to us when we registered the application in Azure AD. And notice the response type is code+id_token meaning we want to get back an authorization code and id_token. And the scope is openid+profile. As I explained every OpenID Connect request must have an “openid” scope and the profile scope indicates we want to access the user profile information.
After the user supplies the credentials in the UI, and approves the consent screen, we skip forward to the stage where Azure AD posts the authorization code and the id_token to the application:
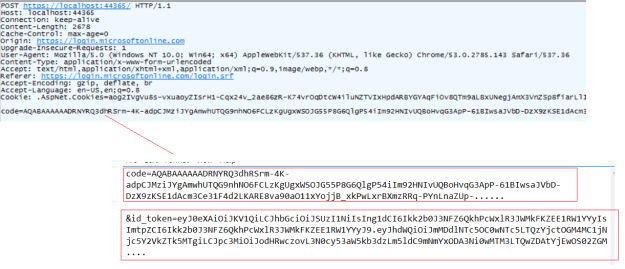
Notice that in the entire process there was no access_token, which is expected since in this particular scenario the application is only using Azure AD for authentication, and it’s not requesting authorization to access a resource owned by the user. This will be covered in a later post.
