Web Apps simply provide you the ability to get your web applications up and running in Azure without worrying about all the details you have to worry about in traditional on premise deployment.
Within the boundaries of your organization, these are some of the concerns that you and other organization teams have to care about whenever you want to get a web applications online:
- Web server settings (ex: IIS) such as application pool, security, required handlers, access permissions, to name few
- Server setup; including OS management, patching, upgrades
- Network settings including security and firewalls
- Not to mention of course the sizing issue, of how much hardware to order and set up
With Web Apps, you just have to focus on the business and leave these (boring) concerns to Azure.
Let’s build a simple example to see Web Apps in action. I will create a default MVC web app, hook it up to Azure AD, and make it online – all in a matter of minutes. Obviously real world applications require much more than this simple example would demand, but the idea to show here is that you are free from time consuming concerns: try to do the same exact example on premise, and it will take you hours if not days.
Make Sure Azure AD Tenant is ready
Before we create the web application, we want to make sure our Azure AD tenant is ready. In the simplest terms, an Azure AD tenant is an AD instance that represents an organization. Inside this tenant we do our usual AD stuff like adding groups and users and so on.
Till the time of writing this article, you’d still manage AD tenants from the old management portal. So if you go to manage.windowsazure.com, navigate to Active Directory, and you will find a Default Directory created for your subscription:

As I said, here you can manage your organization and create users and groups. In this simple example I will not create any users, I will sign in using my Azure subscription account as you will see in a moment. This account is by default member of the Default Directory:

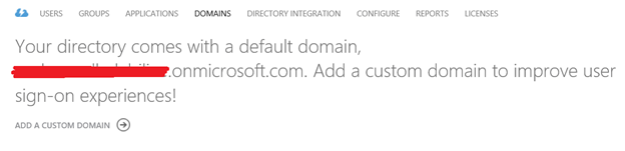
And here is the default domain name that comes with your subscription; you will use this domain to provide authentication to your web app:
Create a Web App
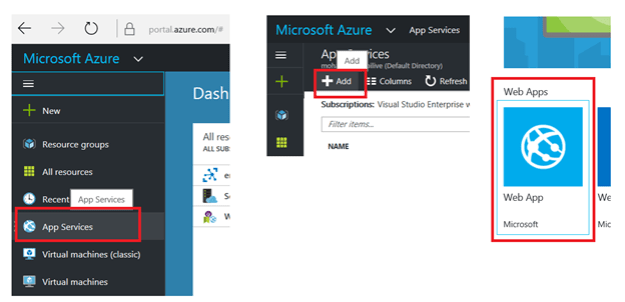
Now to create a Web App service, we can do this directly from VS, but it’s nice to go to the portal and play around.
So go to the new portal.azure.com. Select App Services–>Add–>Web App–>Create, as follows:
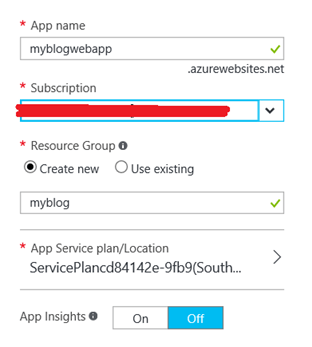
Then supply your own settings, as I did below. Obviously you have to use a unique name; remember you’re creating a live service!
And that’s it, now you’re ready to deploy your application.
Create a Web Application in Visual Studio
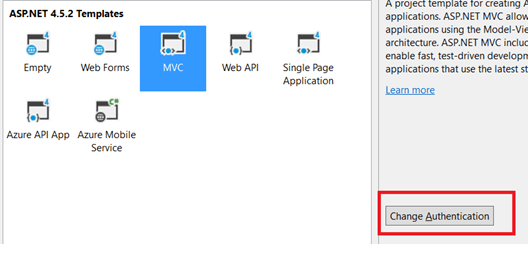
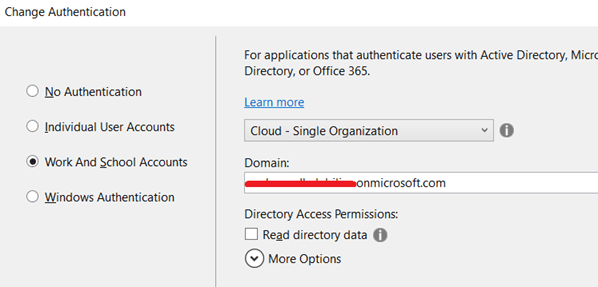
Fire VS 2015 and select the MVC web application template. I simply called this mywebapp. However, select the Change Authentication option:
Select Work And School Accounts, and supply you Azure subscription (if you have not already associated your VS with your Azure account), and then supply the Azure AD domain name you saw before:
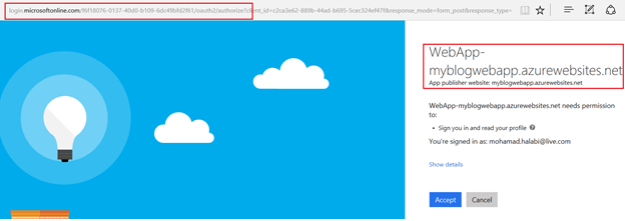
That’s it, now you have an application with delegated authentication to Azure AD. Run the application, and you will see that you are redirected to Azure AD for authentication with a consent screen:
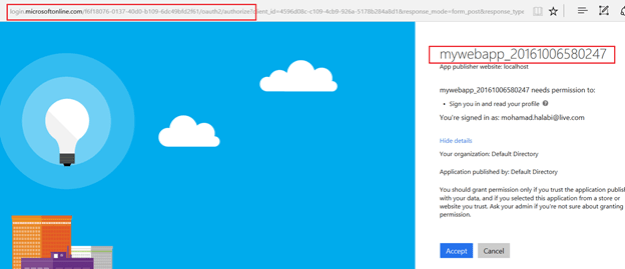
Once you authorize access, you will be logged in using the subscription account I show you before:
I’ll talk more in a future post about this authentication process and the protocol in use.
Deploy Application to the Azure Web App
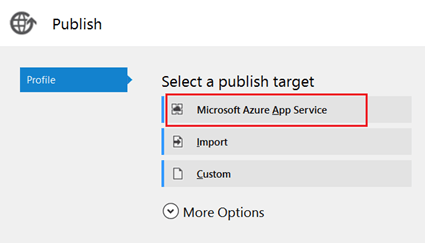
Now we’re ready to deploy this web application to our Web App Azure App Service. Right click the project in VS solution and select publish. Select Microsoft Azure App Service:
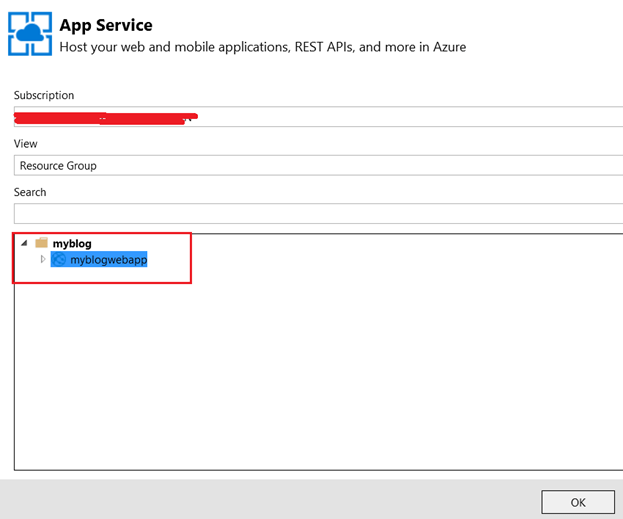
Then select the Web App you created before:
For this sample, keep the default settings and hit publish. VS (might ask you to sign-in again) will then publish the application to your Azure Web App; this might few minutes…
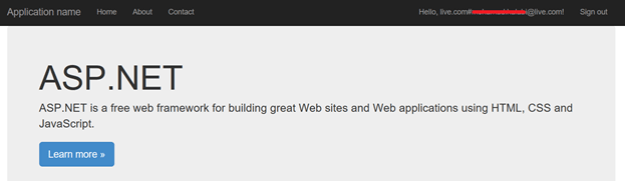
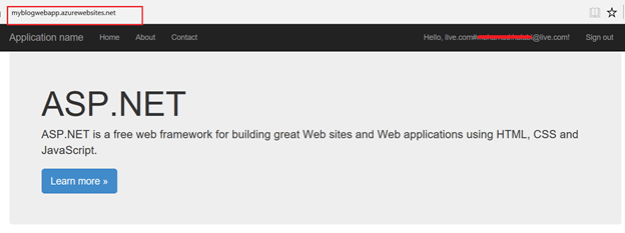
Then you have your web application (with authentication) up running on Azure:
Once you authorize access:
Scaling
Obviously the ability to scale (up and out) on demand (and therefore pay only for what you’re using) is probably a core reason you’re using Azure at the first place. And with Web Apps this is absurdly easy.
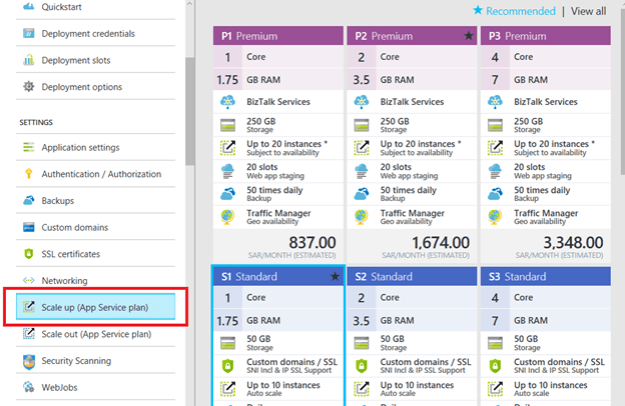
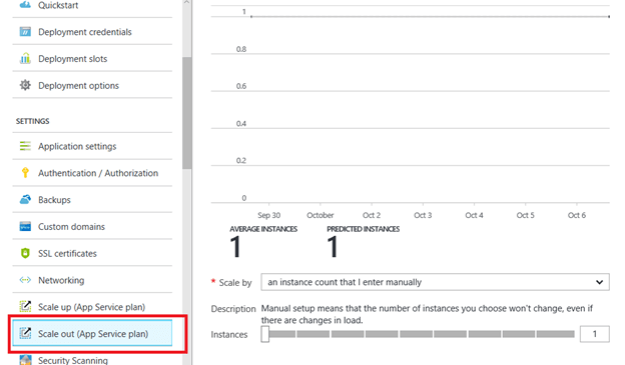
Navigate to your Web App, and you can see setting pages for scaling up and out:
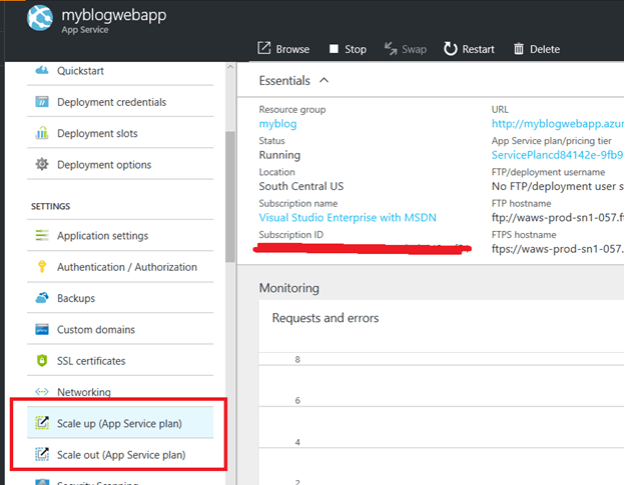
From there you can scaling up by adding more compute power:
…and you can scale out by adding hosting instances:
How this Compares to Cloud Services and Service Fabric
Finally, note that what Azure App Services offer overlaps with other Azure services; namely Cloud Services and Service Fabric. Now things tend to be confusing sometimes as you have various options; nevertheless Azure services are still evolving at a fast rate and I expect with time options will be unified to have standardized solutions for given problems…
But for now you have to know the differences:
https://azure.microsoft.com/en-us/documentation/articles/choose-web-site-cloud-service-vm/
Next
In the next post, I will talk about Deployment Slots, a great feature of Azure App Services.
