Essential Guide to Certificates, Encryption, and Signatures
Secure Messaging
Integrated systems have to deal with tough challenges when it comes to secure messaging. If system A is sending a message to system B, this requires the implementation of important security measures. These can be summarized by:
- Authentication, where System B must authenticate System A before accepting its message
- Data Privacy, means that an intruder – should ever be able to peek into the message – must not be able to see sensitive data
- And Data Accuracy – or Integrity – which means that If an intruder intercepts the message and modifies it, this modification must be detected by System B
Secure messaging is achieved using public and private keys. These are numerical values that are mathematically linked. An organization generates these keys, it keeps the private key as its own secret, and distributes the public key to any organization that wants to do exchange secure messages. Because these keys are mathematically linked, data encrypted with the public key can only be decrypted by the private key.
Now lets see how public and private keys fulfill the 3 requirements about privacy, integrity, and authentication.
Privacy
Consider a case where system A wants to send private data to system B.
- System B first generates the public/private pair.
- System B then distributes the public key to System A, while keeping the private key a secret.
- System A now has the public key of system B. So it uses this key to encrypt the message. It then sends the message over the wire.
- System B is the only entity that can encrypt the message because it’s the only entity that has the private key.
That is why, making sure the private key is never exposed is an essential task.
Integrity & Authentication
Now again, consider the case where System A wants to send a message for System B where its essential that the message is not tampered with on the wire.
- Unlike the privacy process, its now System A that generates a public/private key pair.
- It distributes the public key to system B and keeps the private key secret
- System A first calculates a mathematical summary of the message – called a hash or message digest. This hash is almost unique per string; meaning that it is very unlikely that two different strings will produce equivalent hashes.
- System A now, uses its own private key to encrypt the hash. **This result of encrypting the hash is known as a digital signature.
- After receiving the message, System B first calculates the hash of the message
- It then uses the public key of System A to decrypt the hash that was sent along with the message
- So, system B now has its own calculated hash, and the decrypted hash it received from system A
- If both hashes match, then this proves that the message has not been tampered with.
- Now along the way, System B has also authenticated System A. This is because once System B was able to decrypt the hash, this proves that the message had indeed came from System A, because System A is the only one that has the corresponding private key.
Digital Certificates and Certificate Authorities
Digital Certificates – commonly refereed to as just certificates – are electronic documents that contain the public key. These certificates are signed by trusted entities called Certificate Authorities – or CAs. This signature from the CA verifies the owner of the certificate and binds the identity of the public key to the owner.
Let me clarify this in an example:
- Again back to our scenario of systems A and B.
- System A wants to send encrypted messages to system B.
- In this case, you know that system B must sends its public key to system A in order to use it to encrypt messages
- However, en evil system Z enters the picture. System Z wants to trick A into sending it the secure messages.
- So system Z generates its own private/public key pair. Then it sends the public key to system A claiming to be system B.
Now, how can system A tell that its being tricked by the evil system Z? Here comes the role of CAs. A CA certifies that a public key is owned by a certain entity.
So in this scenario:
- System B would ask a CA to sign its public key.
- CA verifies system B, and then generates a certificate containing system B information as well as the public key, and then signs this certificate with its own private key.
- Now when System A receives the certificate from System B, it finds that it is signed by a CA.
- It then makes sure the CA is trusted by verifying its signature. At this stage, System A is now sure that the certificate belongs to B as certified by the CA.
Now the question is, how does system A decide to trust a CA?
To answer this, let me show you an example.
If you use your browser to visit live.com which is secured by SSL. Live.com sends back a certificate to assure you that it’s truly live.com and not some evil site…a similar case to Systems A, B, and Z I explained before; where here your browser is A, and live.com is B:
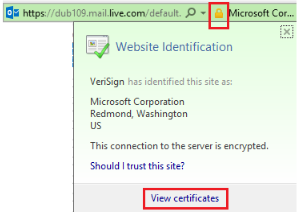
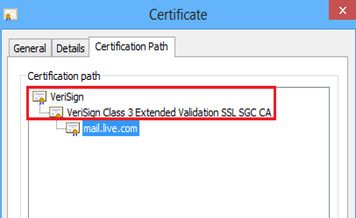
So how does the browser decide, if it should trust the certificate sent by live.com? If you click on the lock icon, and then select view certificates. You will then see the certificate information. In the Certification Path tab, you will see that it has been signed by VeriSign:
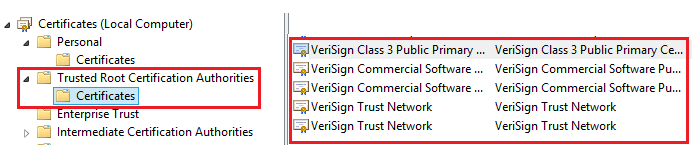
VeriSign is a CA which has its own public key installed in the local computer trusted CAs store:
How to generate private keys and certificates?
Finally, lets review briefly how you can get your private and public key pairs.
- You can generate a private/public key pair using any tool or code that implement the correct algorithm. I did not discuss algorithms in this guide to keep it as compact as possible, but one of the most famous is RSA.
- You can then send the public key to a third party trusted CA to give you back a certificate
- Some organizations run their own CAs. For example, windows server provides the required infrastructure to run a CA.
- A final option which commonly used in development and testing scenarios, is to generate self-signed certificates. Makecert, is a windows tool which creates a private/public key pair, and then creates and self-signs the certificate. The certificate won’t be trusted by default; of course because it is not signed by a trusted CA. but in development environments, you can get around this, by either making the application code neglect checking the CA chain, or place the CA – in which case the certificate itself – in the trusted CA store…something which I did in the previous module.
.cer & .pfx
As a final note, when you see a file with the cer extension, then this is a certificate file – meaning it contains only the public key.
When you see a file with the pfx extension, then this contains the private key.
Some certificates in the store, have the private key attached to them.
For example, a self-signed certificate, will have a private key attached to it. So, when you export it, it will give you the chance to export the private key, which will result in a pfx file:
Another example, would be a SSL certificate which is used to secure your local IIS. This will also have a private key attached to it.
Setting BizTalk to Use Certificates, Encryption, and Signatures
Now that you have the knowledge from the previous section, understanding how BizTalk implements message security, becomes a breeze. In the context of the discussion of the previous section, BizTalk can be System A or System B. Meaning that it can be the system sending encrypted and signed messages, or the system decrypting and verifying these messages.
So the only thing left to be explained, is how to configure BizTalk to use the required certificates and the component that performs the encryption and signing.
Creating the self-signed certificate
As I said in the previous section, the most common practice during development is to create a self-signed certificate. I will show you how to create a self-signed certificate. And then how to use the public and private keys to secure messages in and out of BizTalk.
Remember, that in real scenarios, the public key will be given to you by the other system.
I used the following command to create a self-signed certificate using makecert tool:
makecert -r -pe -n “CN=mohamadpc” -eku 1.3.6.1.5.5.7.3.1 -ss my -sr currentuser -sky exchange -sp “Microsoft RSA SChannel Cryptographic Provider” -sy 12
Replace the common name with the fully qualified name of your machine.
This command creates self-signed certificate that can be used for both encryption and signing.
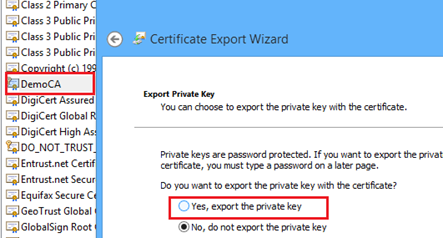
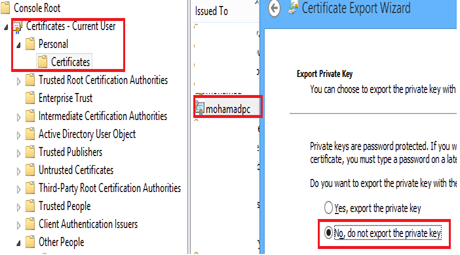
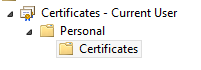
The result is a certificate stored in the Personal Store of the local user – that is the user that is logged into the machine. Now from the Management Console, export the public key portion only of the certificate, and store it some where. You will import it into the proper location in the next steps:
The public key will now simulate the one that you should get from the other system. This time, export the private key and store it somewhere. Again, you will use this key later.
Now, lets see how to configure BizTalk to use these private and public keys.
Certificate stores used by BizTalk
BizTalk uses two certificate stores; one for each of the private and public keys.
The first is the personal store of each receive and send host instance service account. The private key is stored in these stores. To clarify this, assume that you have one host instance that you want to use to receive encrypted messages, and another host instance that you want to use to send signed messages. If the first host instance uses account User1 for login, and the second host instance uses account User2 for login:
Then the private key you exported in the previous step, must be imported into the personal stores for these users:
The second store used by BizTalk is the Other people certificate store of the local computer. The public key is kept in this store:
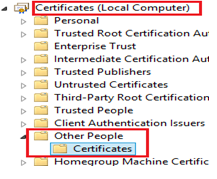
if you think about it, you will find it very logical. Recall that this public key is the one you receive from other parties. So its not bound to a particular machine user, so it won’t go into the personal store. And since its coming from “other” parties, its perfect location is the “other” people store.
Send Encrypted Messages
When BizTalk wants to send an encrypted message to an external system, it must use the public key of that system. Therefore, BizTalk will access the Other People store.
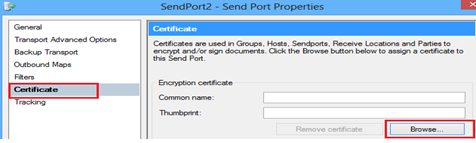
When configuring a send port, select the Certificate tab, and then you can browse all certificates located in the other people store:
Now you need to create a custom pipeline which has the MIME encoder component to implement the encryption. As you know, the default XmlTransmit pipeline does not include this component. In the custom pipeline, drop the MIME encoder in the Encode stage, and set its Enable Encryption property to true:
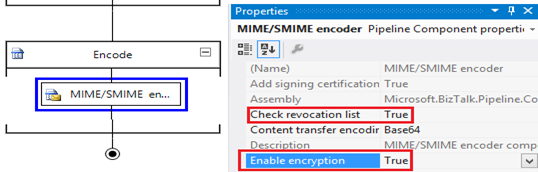
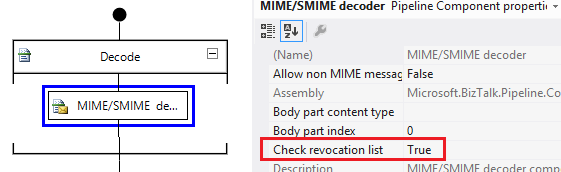
One interesting property is the Check revocation list. You can set this property to false in development environments if you’re using a self-signed certificate. Or, you can install the certificate in the trusted CA store.
Send Signed Messages
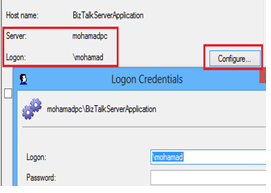
Now When BizTalk wants to send a signed message, it must use its own private key. Therefore, it will access the personal store of the sending host instance login account.
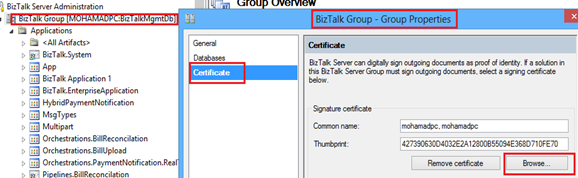
BizTalk can use one signing certificate per group. Login as the service account of the send host instance, and from the BizTalk group properties, browse the personal store and locate the certificate with the private key:
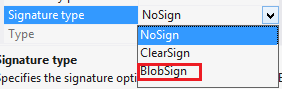
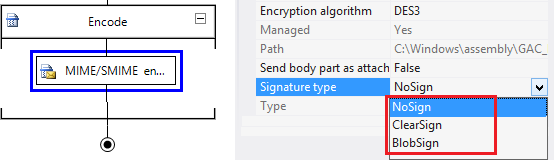
Again, you will have to create a custom send pipeline with the encoder MIME component. This time you set the Signature Type property to either clearsign or blobsign. I will discuss the difference in a moment:
Receive Encrypted Messages
When BizTalk receives an encrypted message, this means that the other party has encrypted it using the public key that was distributed by BizTalk. So BizTalk needs to access the personal store of the receive host instance account to decrypt and verify the message.
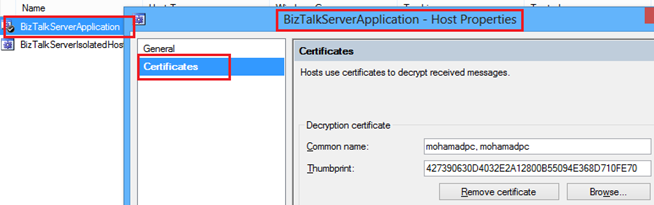
From the properties of the host where the receive handler is running under its instance, from the certificates tab, browse the personal store of the instance account to locate the private key that will be used for decryption:
Now you have to create a custom receive pipeline, with the MIME decoder component:
Receive Signed Messages
Now finally, for BizTalk to receive signed messages, this means that the other party has signed it using its own private key, and biztalk must use the public key distributed by the other party to verify the signature. So biztalk will need to access the Other People store.
Just like the case of receiving encrypted messages, you can use the same pipeline configuration. No additional configuration is required:

Party Resolution
Party Resolution is a technique to resolve the identity of parties based on their digital signatures. Recall that at the start, I talked about 3 main secure messaging challenges. Message privacy and integrity are covered by encryption and digital signature techniques.
The third concern, which is authentication, can be covered by the Party Resolution technique.
To configure party resolution, from the administration console parties node, create a new party:

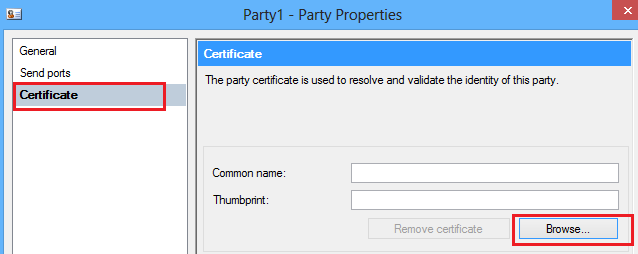
After you provide a name for this party, from the certificates tab, browse the other people store and select the digital certificate that represents this party:
This means that now when BizTalk receives a message signed with a digital signature matching the selected one, a Party ID property indicating the party associated with the certificate, will be written into the message context.
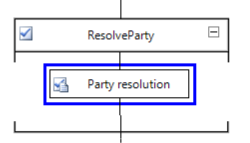
Finally, you need to add the Party Resolution component into the ResolveParty stage in the same receive pipeline you created to receive signed messages:
Mixing Encryption/Decryption
Nothing changes from the perspective of BizTalk configuration if your sending an encrypted and signed message at the same time; or if you’re receiving an encrypted and signed message at the same time.
The same configuration holds.
The only difference is that if your sending an encrypted and signed message, then when configuring the MIME encoder you must select blobsign and you cannot select clearsign: